Wednesday, June 23, 2010

Introduction to Aquatic Photography Part I: Getting Scuba Certified
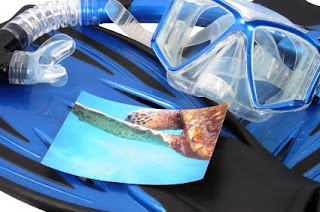

This summer we’re providing a three part series that will cover a number of aspects of underwater photography. Whether you just want to get better underwater shots of your kids in the pool, expand your abilities when snorkeling or become scuba certified in order to shoot fantastic tropical fish and reefs, we’ll explain how to make the most of every situation. In Part I, we’ll cover how to choose the right scuba instructor and dive shop in order to get certification, allowing you the opportunity to begin your underwater photography safari.

Scuba-diving is a sport that conjures up ideas of adventure and treasure-hunting. What many people don’t realize is that it’s also a sport that can be done regardless of being 21 or 61, and for those who’ve always wondered what it would be like to shoot underwater, getting scuba certified is an important required step in reaching that goal.

Scuba-diving can be a bit perplexing because, unlike other sports, there really isn’t a way to dabble in it to see if you like it. But there are ways to decide if this is something you’d like to pursue. If you’re intrigued or interested, here are a few tidbits to help you get started:

Find a Reputable Dive Shop: Get started by doing an online search to find a few dive shops or instructors in your area. Ask about the possible options for courses and the time and equipment commitment needed to get started. Also ask about their certification—the best-known associations are PADI (Professional Association of Diving Instructors) and NAUI (National Association of Underwater Instructors). Inquire about the qualifications of their instructors and about their safety record. And ask what kind of money-back guarantee they have in case an emergency comes up and you’re unable to go through with the entire course.

Don’t Be Shy: If you have any questions, please ask them. Many people who worry they may not be able to learn to scuba-dive are pleased to find once they begin that they’ve discovered a passion for a new sport. There are a few considerations to ponder. For example, if you’re age 40 or over, you’ll need to have a physical first to ensure good health, and those with specific respiratory issues such as asthma will need to first check with their primary physician before continuing.

Get a Buddy: Scuba-diving is considered a social sport and having a friend with you in the class can help in a number of ways. You’ll learn various skills that require two people and you’ll also need a dive buddy whenever you go out after certification, so why not find a friend to join you? If you’re unable to find someone to take the course with you, the instructor will pair you up with someone, giving you an opportunity to make a new friend or two!

Find the Right Fit: Your relationship with your scuba instructor is very important so make sure you find someone with whom you feel comfortable learning. If you find that you’re having trouble relating to an instructor, politely inquire about other classes or options. Professional instructors shouldn’t be offended as they understand that there are some situations where a different instructor is a better fit for a particular client.

It’s important to note that the quality of the photographs you shoot will depend largely upon your skills underwater and how well you handle issues of mastering neutral buoyancy and related diving skills. Once you’ve received your scuba certification, you’ll then be in a position to begin your underwater photography adventures and can even enroll in an underwater photography course.

Thursday, December 03, 2009

An Interview with Tamron


Tamron asked me to answer a few questions regarding how I use their 18-270mm lens. We discuss the common struggles many moms face juggling kids while shooting sports, how the VC technology helped me while shooting horse shows and the importance of keeping a sense of humor anytime you combine kids, deadlines and photography. You can read it here: http://www.tamron.com/enews/archives/nov09_oles.asp

Wednesday, October 28, 2009

Tips for Terrific Halloween Shots


Just combine the promise of free candy with a group of small children and you have a recipe for a challenging photo opportunity. With a bit of planning, however, you can bet on snapping some super shots of your favorite little goblins this October 31st!

Start Early: Get a jump start on your evening by planning a few extra minutes for your photography before the festivities begin. Let the little ones know in advance that cooperation now means they’ll get to the candy faster! This technique will often buy you a few extra wiggle-free moments to start shooting.

Try Twilight: The hour or so before the sun sets is the perfect time for photography. The lighting conditions will be favorable and may provide a nice, warm cast to your images.

Through the Looking Glass: If you have a glass pane on your front door, try having the kids look through while you shoot from the other side. Just remember to turn your flash off so light doesn’t bounce off the glass.
Now Let Them Run: Try taking a few pictures of your kids running down the sidewalk with their treat bags in tow. Make sure your ISO is set to a higher setting to catch the movement and pick your perfect spot to shoot before you let them run free.

Nighttime Shots: The right flash distance can make all the difference when it comes to creating that perfect image. Most cameras have a flash that is effective somewhere between five and ten feet from the subject; just don’t stand too close or else you may find your picture looks too bright or overexposed.

If you shoot using a DSLR, a high-quality add-on flash unit can greatly improve your images and allow you to capture fantastic nighttime pictures. Stop by your favorite photo store (mine is Precision Camera & Video in Austin) to find the perfect fit for your needs.

Saturday, September 12, 2009

Organizing Your Summer Shots


So, you’ve been taking pictures with reckless abandon this summer. Good for you!

This strategy is sometimes necessary, such as in sports photography, to get that perfect picture. Once you’ve got the images you want, it’s time to spend a few minutes ruthlessly deleting pictures you don’t love. Yes, you heard right…be ruthless! You don’t need six family shots all posed the same way (unless you plan on combining the images in Photoshop later). Find the best one in each scenario and delete the rest. Think of this strategy as cutting the clutter for your computer. It will be easier to find your favorite photos if they aren’t surrounded by mediocre shots, and your hard drive will have more room to store those pictures that really do take your breath away.

Monday, April 06, 2009

Your Living Library


There are few thing s that can touch the soul more deeply than gazing at a picture of a loved one. And sometimes, those old photos—the ones crammed into a tattered cardboard box that had been sitting in the closet for years untouched—can reveal a path from your past that widens your world in ways you never anticipated.

My dad and I had often talked about “Grandma Mary’s box” and how we really needed to go through its contents and get things organized. We even looked through a few things but never really got serious about it.

Then my dad’s cancer returned.

I flew to Washington to spend some time with him –he is almost finished with chemo and doing very well—and we had an opportunity to finally tackle that box. There’s nothing like a health scare to put your priorities in place, and for us, those priorities included making sure that our future generations could find old family photos and learn the stories behind them.

I thought I knew my grandmother and her origins, but going through those photograph gave me a much better understanding of her.

I learned my great grandmother was an orphan.

I learned what my dad was like as a teenager and about his early years as an Air Force Officer.

I learned what a savvy marketer and businesswoman my grandmother was in her day.

My dad, brother and I spent several hours around that box. My dad shared stories and answered questions I’d never before thought to ask. I’m committed to making sure my own children (and one day FAR AWAY) my grandchildren know these stories and see these photographs. They are a living pictorial of those who came before us; it is up to us to continue the tradition.

Here are a few tips to help you convert that box of scattered pictures and memorabilia into a living library that loved ones will return to often:

Make it Fun: We tend to look at organizing projects as dreaded tasks, but this one can be an entertaining family event. Invite family over, order pizza and gather round the table or living room floor to get started. As you start sorting through photos, conversations will start and memories will be shared. Consider this a celebration of your ancestors and a way to honor their lives. It’s also a great way to spend a Friday night.

Create Your Own Method: So many people think they need to organize photographs chronologically, but this can be a taxing and tedious process. Instead, look at the items and create groups that make sense. With our family photos, for example, we divided the piles into my grandfather’s and grandmother’s sides of the family and worked from there. We also created a “Cousins” pile and separate piles for newspaper clippings, passports/documents and other items.

Label Photos: I joked with my dad about this because he kept writing “me” on the back of his old photos (The man has a Ph.D.!). I reminded him that the idea was for other family members to know who he was and that required using his full name. It doesn’t have to be fancy but try to be as descriptive as possible about the people shown in each photo.

Choose Quality Storage Boxes: Don’t think that you have to put everything into photo albums. If you’d prefer to go that route, that’s wonderful, but acid-free archival boxes (each labeled accordingly) work very well for this purpose. Consider using upright plastic file folders (often used for in-process scrapbook pages) to preserve larger documents and newspaper clippings.

So, please let me remind you that your photography is more than just a hobby.

It’s more than just shooting pictures at a birthday party.

You are creating your own living library, one that will touch countless people in numerous ways.
And it will continue long after you’re gone.

What story will you leave behind?

On the Hunt for Great Easter Photos


Easter Sunday comes early this year, so now’s the time to get ready to record exuberant little egg-hunters as they search nearby land for treasures nestled in the grass and hidden from view.
Here are a few ideas to help ensure you’re ready to hop on that perfect shot:

·Visualize in Advance: Are there certain traditions held each year that you’d like to capture? Plan a few shots and consider which locations would give you the best results. For example, before the kids run in an Easter egg hunt, where should you stand to make sure you capture their faces in the photograph

·Check Your Gear: Is your digital camera’s battery fully charged? Have you downloaded pictures from previous events onto your computer and re-formatted your camera card so it’s ready to go? Do you remember how to use the timer function? It only takes a few minutes to make sure your camera gear is ready, and it’s worth the time if it saves you from having your camera battery shut down in the middle of all the fun.

·Prepare Your Props and Place: If you want to shoot posed images, consider setting up one mini shooting area and include props such as an Easter basket, stuffed animal rabbits or other items you feel would properly adorn your photos in a kid-friendly way. Check how the image is framed in advance to determine if your props are properly spaced and leave enough room for your subjects.

·Capture Color: Easter is filled with colorful eggs, dresses and decorations. Consider taking a few close-up shots that center on a single colorful object or arrangement. Try to keep the image composition simple so the color is stunning.

·Get Low: Crouch down low during the egg hunt to give your photos a unique and personal perspective. Let the child’s reach be at the forefront of the image and shoot upward; the result is candid and yet very personal.

Grand Vision and Strong Community Ties Part of the Austin Center for Photography Plan


David Keenan, Founder and President of the Austin Center for Photography, has always had a knack for bringing talented groups of people together. Growing up, his networking skills and strategic thinking flourished on the basketball court. “I always loved to get teams together, and they could be three-on-three teams or city league teams-- it didn’t matter. Our win/loss record was pretty good because it was all about finding the right group of talent and bringing them together.”

Keenan, who has built a successful career in the software industry, is now turning his attention to his passion for photography. Keenan has long carried a vision for creating a grand, top-tier photographic center in Austin that features national as well as local talent—one that provides a welcoming community for those with a love of photography. Keenan turned to the Houston Center for Photography to expand his knowledge into how successful photography-centered non-profit entities operate. “Madeline Yale (Executive Director and Curator of HCP) and many other members were extremely helpful in sharing information about how they’d made HCP successful.”

The Board members of ACP envision a uniquely-Austin center designed to celebrate the breadth of talent across the country as well as in our own backyard. Keenan states that the ACP board is filled with “a great group of people, each with unique talents, and each is committed to the success of this vision. Jerry Sullivan, owner of Precision Camera & Video, is a member of the board. There are no egos involved. They just want to see ACP grow and connect with the community.”

Keenan also states that Austin is home to many highly-regarded and talented photographers and bringing them together as a resource to celebrate the craft and connect with the community is a driving force in expanding ACP. “There are so many celebrated photographers in Austin and most people don’t even realize they live here. For example, Marianne Fulton, an ex-curator of the George Eastman house and the author of Mary Ellen Mark: 25 Years, calls Austin home. She is just one example of the rich resources we have here in our city.”

The ACP’s first Icons in Photography event, An Evening with Mary Ellen Mark, was a huge sold-out success. Ms. Mark was then interviewed by Texas Monthly Talks’ Evan Smith (this interview will air in early May). There are three more events planned this year, the next one being An Evening with Alec Soth on June 4, 2009. Future plans for ACP within the next three years include expansion into offering a national competition with possible grants and awards, two galleries that feature national and local artists, a variety of workshops and an integrated coffee shop with walls to be graced with quality photographic art. There is also some discussion about a possible youth outreach initiative to encourage young photographers to pursue their passion for the craft.

The Austin Center for Photography is still in its infancy but many see its potential as nothing less than stunning. The ACP welcomes volunteers to assist with its Icons in Photography Events and also offers memberships that start at as little as just $30per year. For more information, visit

Sunday, March 15, 2009

Using Photography to Support Your Kids’ School


Like many parents, you invest time supporting your children’s school through volunteer work, fundraising, chaperoning field trips and other labors of love. Parental volunteers are a powerful and important part of helping educators give our kids the best possible experience in and out of the classroom. If you love taking pictures, you might consider using your hobby to contribute to your school’s efforts.

As the unofficial photographer for my kids’ classes, I enjoy the opportunity of shooting these events and sharing them with parents who were unable to attend due to work or schedule conflicts. Let’s face it—as involved as we are, we have many other work and personal roles and simply can’t be at every single event for every single child. Having someone take photographs of the class during a field trip can be a wonderful gift for those parents who were unable to attend. The images can also be used to help the school promote itself, its fundraising efforts or for other related purposes. In addition, the images can be used to create personalized teacher gifts at the end of the year.

Here are a few tips to turn your photography into both a gift for parents and a marketing tool for your school:

Personalize the Shot: Group shots are wonderful and necessary but make sure to take individual shots of each child if at all possible. Zoom in close to fill the frame with the child’s face and wait for that candid smile or impromptu interaction. These magical moments just require a bit of planning and patience. Ignore the bustle around you for a few seconds to see if you can portray the essence of what that child is experiencing.

Capture Interaction: Some of the best photos are those of children engaged in particular projects or working together. Even something as seemingly simple as sharing a lunch outdoors on a picnic table can translate into an extraordinary photograph. Look for kids who are enjoying a moment together and start snapping away. Just don’t get too close—your goal is to capture the moment, not interrupt it.

Share & Upload: Once your event is over, make sure to upload your photos to your local photo store’s online website. It’s one of the easiest ways to share images and you can simply email a link to the album to all the parents and teachers involved. They can then order prints and other items from the photo store directly.

Get Permission: It is very important to get permission and to have a parent sign a standard model release anytime the child’s picture might be used for posters, flyers or other promotional item. There are standard model release forms that can be found online for your school to use. Some parents may prefer not to have their child included, and that’s okay. Your school’s office should already have these provisions in place, but if not, find the form and have copies made for each child in the class.

The next time you gear up for a field trip, make sure to take your camera (and accessories) and assign yourself the role of event photographer. It’s a chance to practice your hobby and an opportunity to give a gift to the kids and families all while supporting the school.

Tuesday, January 13, 2009

A New Year’s Resolution that Still Lets You Enjoy Dessert


I just can't seem to give up chocolate.

While I love the fresh start that each New Year offers, I shun any resolution that involves giving up sweets, watching Deadliest Catch or finding matches for all the stray socks, Army men and Barbie shoes that populate my casa.

Those things are here to stay.

So, for all you weary change-agents, here’s my suggestion:

On your list where it says “go to gym 8 days a week” and “give up dessert until my 85th birthday”--go ahead and just scratch one of those off and replace it with “organize my digital pictures.”

This resolution is one that is very attainable, although it may seem like a daunting task at first. For those who still remain unconvinced, here is my cheat sheet for how to make sure you can find your favorite photos without losing your cool.

And it only requires 30 minutes per week.

Week One:
Start Searching: Get online and do a search for ‘image management software’ or ‘photo organization’ programs. Write down a few that look good. Maybe they had solid reviews from a computer magazine or other resource that you trust. Print out a few pages from your search and put them in your folder. All done.

Week Two:
Pick and Play: Spend 30 minutes reading about the top choices. Which ones have features you like (and are explained in a language that resembles English)? Do you want to mark your favorite photos, learn how to edit and enhance them, or find that picture of Uncle Lou on a moment’s notice? Take a few notes on the sheets you printed last week that will help you remember which products you liked and why.
Don’t forget to call your favorite photo retailer to ask their recommendation. These folks are the professionals and can guide you to the best product for your needs.

Week Three:
Bite the Bullet and Buy (or Not!) Many image management programs offer free trials or even free copies. Choose the program you think will best suit your needs and download a trial version. Don’t play with it yet if you don’t have time. Make sure to completely back-up your images on an external drive or to DVD before installing any new programs (as an extra precaution). Then install the software (making sure it comes from a reputable source) and make sure it opens properly.

Week Four:
Wander and Explore: Your goal here is not to become an expert. It’s simply to play with a few tools and see what each one does. Don’t save any of your changes if you’re editing a photograph. Just consider yourself an imaging explorer and get a lay of the land, so to speak.

Week Five:
Choose One Thing: Pick a technique or feature you’d like to learn. Only one. Experiment, search the online help files or Google the topic to pick up some tips. You can even find photo software tutorials on YouTube.
If you’d like to learn more, great. If not, go back to your chore list.
One warning here: once you get started, you might discover that you’d rather do this than the laundry, and that’s okay. In fact, it’s encouraged.

Week Six and Beyond:
Repeat Week Five.

Hey, maybe this photo organizing resolution is one that will stick.
If not, well, do an extra 30 minutes in the weight room for me, ok?